

Easy Waterproofing Hacks for DIY Enthusiasts
- Nivi Watson

- Dec 25, 2025
- 6 min read
Have you ever noticed a suspicious damp patch creeping across your ceiling? Or perhaps you've spotted that telltale musty smell in your bathroom that just won't budge? If you're a Malvern homeowner, you've probably wondered whether waterproofing is something you can tackle yourself or if it's best left to the professionals.
Here's the thing—water damage is one of those sneaky problems that starts small but can quickly spiral into a costly nightmare. Whether it's a leaky shower recess, moisture seeping through your basement walls, or gaps around your windows letting in the Melbourne rain, proper waterproofing is absolutely key to protecting your home. The good news? Many waterproofing tasks are well within reach of confident DIY enthusiasts.
In this guide, we'll walk you through everything you need to know about waterproofing your bathroom, sealing problem areas, and choosing the right products for the job. You'll discover practical hacks that won't break the bank, learn when it's worth calling in the experts, and pick up tips that'll help keep your Malvern home dry for years to come. Let's get stuck into it!

Understanding Waterproofing Basics
What Is Waterproofing and Why Does It Matter?
Waterproofing is essentially creating a barrier that prevents water from penetrating surfaces where it shouldn't. Think of it as giving your home a protective raincoat. This barrier stops moisture from seeping into walls, floors, and foundations—places where water can cause serious structural damage over time.
For Malvern homes, waterproofing is particularly vital. Melbourne's weather can be unpredictable, with heavy rainfall and humidity creating the perfect conditions for water damage. Without proper waterproofing malvern, you risk everything from mould growth to rotting timber frames and even foundation problems.
Common Signs Your Home Needs Waterproofing
Keep an eye out for these warning signs: peeling paint, bubbling wallpaper, musty odours, visible mould, and damp patches on walls or ceilings. You might also notice efflorescence—those white, chalky deposits on concrete or brick surfaces. If your bathroom tiles feel spongy underfoot, that's a major red flag indicating water has penetrated beneath the surface.
Can You Do Waterproofing Yourself?
The short answer is yes—for many projects. Simple jobs like sealing gaps, applying waterproof coatings to walls, and even waterproofing your bathroom are manageable with the right preparation. However, structural waterproofing or anything involving your home's foundations typically requires professional expertise.
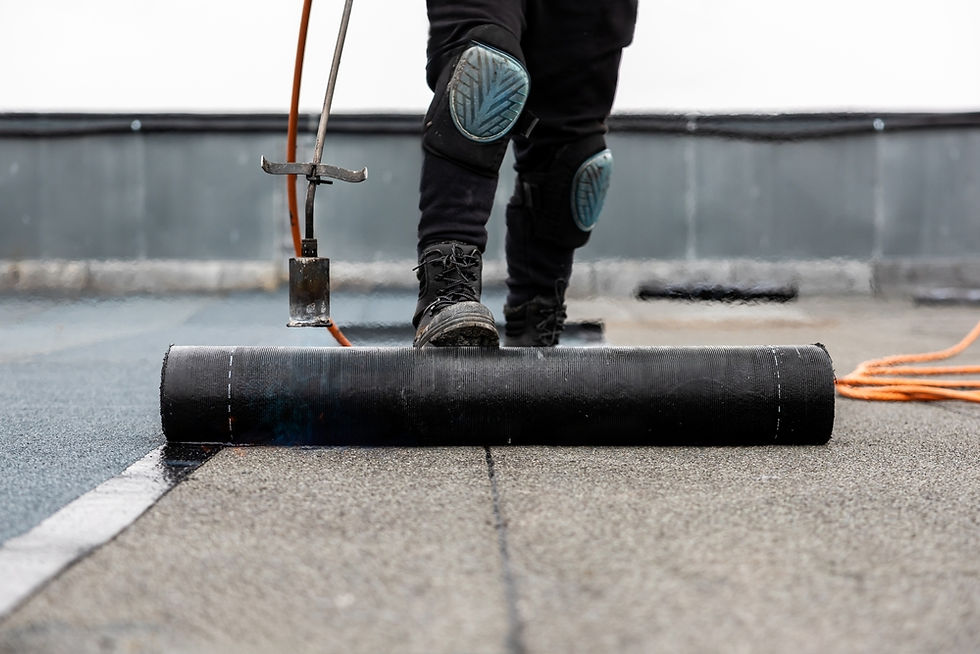
Waterproofing Your Bathroom: A Complete DIY Guide
Essential Materials and Tools You'll Need
Before you start waterproofing your bathroom, gather these essentials: a waterproof membrane (liquid or sheet), primer, reinforcing tape for corners and joints, a paint roller or brush, and safety gear including gloves and goggles. You'll also need a scraper, sandpaper for surface preparation, and possibly a caulking gun for sealing edges.
Quality matters here. Cheap products might save you money upfront, but they often fail sooner, leading to expensive repairs down the track. Invest in reputable Australian brands that meet AS 4858 standards for wet area membranes.
Step-by-Step Bathroom Waterproofing Process
First, prepare your surfaces thoroughly. Remove any old sealant, clean away soap scum and grime, and make sure everything is completely dry. Apply primer to help the membrane bond properly.
Next, apply your first coat of liquid membrane, working it into corners and around fixtures. Embed reinforcing tape in these vulnerable areas while the membrane is still wet. Once dry, apply a second coat at right angles to the first. Most products require at least two coats to achieve proper coverage.
Pay special attention to areas around the shower, bath, and toilet—these are the spots most likely to fail. The membrane should extend at least 150mm up walls in wet areas and cover the entire shower floor.
How Long Does Bathroom Waterproofing Take to Dry?
Drying times vary depending on the product, humidity, and ventilation. Generally, allow 24-48 hours between coats and at least 72 hours before tiling. Rushing this process is one of the biggest mistakes DIYers make. Patience here prevents problems later.
Common Bathroom Waterproofing Mistakes to Avoid
Don't skip the primer—it's not optional. Avoid applying membrane too thickly in one coat, as this can cause cracking. Make sure you've got adequate ventilation during application and drying. Plus, never tile directly onto a membrane that hasn't fully cured.
Quick and Easy Waterproofing Hacks for Problem Areas
Sealing Gaps Around Windows and Doors
Gaps around windows and doors are prime entry points for water. A tube of quality silicone sealant and a caulking gun can work wonders here. Clean the area thoroughly, apply the sealant in a continuous bead, and smooth it with a damp finger for a professional finish.
For larger gaps, consider using foam backer rod before applying sealant. This provides a better seal and uses less product. Check your seals annually and reapply as needed—silicone typically lasts 5-10 years.
Protecting Your Balcony and Outdoor Areas
Balconies cop a lot of weather, making waterproofing essential. Start by checking your drainage—blocked outlets are a common culprit for water damage. Apply a waterproof coating designed for external use, paying attention to the junction where the balcony meets your home.
Consider adding a slip-resistant additive to your final coat. This provides safety benefits along with protection from the elements.
Basement and Foundation Waterproofing Tips
Basement waterproofing can be tricky, but there are DIY options for minor issues. Interior waterproof paints and coatings can help with minor dampness. Make sure your gutters direct water away from your foundation, and check that the ground slopes away from your home.
For serious basement water issues, you'll likely need professional help. Foundation problems are not something to take lightly, as they can affect your home's structural integrity.
What Is the Cheapest Way to Waterproof a Wall?
For interior walls with minor moisture issues, a waterproof paint is your most budget-friendly option. These paints create a barrier while still allowing the wall to breathe. For external walls, a clear waterproof sealer can protect masonry without changing its appearance.

Choosing the Right Waterproofing Products
Membrane vs Liquid Waterproofing: Which Is Best for DIY?
Liquid waterproofing membranes are generally easier for DIYers to apply. They go on like paint and conform to irregular surfaces without cutting or folding. Sheet membranes offer excellent protection but require more skill to install properly, especially around corners and fixtures.
For bathroom projects, liquid membranes are typically the go-to choice. They're forgiving of minor application errors and can be easily touched up if needed.
Best Waterproofing Products Available in Australia
Look for products from trusted Australian brands like Davco, Ardex, and Gripset. These companies offer comprehensive systems including primers, membranes, and sealants designed to work together. Always check that products meet Australian Standards—this isn't just red tape, it's your assurance of quality performance.
How Much Does DIY Waterproofing Cost Compared to Professional Services?
DIY bathroom waterproofing typically costs between for materials, depending on the size of your space and products chosen. Professional waterproofing in Malvern might set you back or more for a standard bathroom.
The savings are significant, but factor in your time and the risk of mistakes. A failed DIY waterproofing job can cost thousands to rectify, plus the hassle of removing tiles and starting over.

When to Call a Waterproofing Specialist in Malvern
Some jobs genuinely need professional expertise. If you're dealing with structural water damage, basement flooding, or failed waterproofing that's caused damage to adjoining areas, call in the experts. The same goes for commercial properties or rental investments where compliance and warranty matter.
Local Malvern waterproofing specialists understand the specific challenges of Melbourne's climate and building styles. They can identify issues you might miss and provide warranties on their work.
Protecting Your Home for the Long Term
Waterproofing might not be the most glamorous home improvement project, but it's one of the most important. By tackling these tasks proactively, you're protecting your home's structure, your health, and your wallet from the costly consequences of water damage.
For many jobs—particularly waterproofing your bathroom, sealing gaps, and protecting outdoor areas—DIY is absolutely achievable with the right preparation and products. Take your time, follow manufacturer instructions, and don't cut corners on quality materials.
That said, know your limits. When water problems are serious or structural, professional waterproofing in Malvern is worth every dollar. Your home is likely your biggest investment, so protecting it properly just makes sense. Now grab that caulking gun and get started—your future self will thank you!


Comments