How to Install a Waterproof Shade Sail: A Step-by-Step Guide
- Kate Westall
- Nov 17, 2025
- 6 min read
If you're anything like me, you love spending time outdoors—firing up the barbie on a sunny afternoon or watching the kids splash in the pool without a care. But let's face it, our harsh Australian sun can turn that dream into a sweaty reality fast. That's where waterproof shade sails come in. They're not your average backyard add-on; they're a smart way to block UV rays, keep rain at bay, and make your outdoor space usable year-round. In this guide, we'll walk you through everything you need to know about installing waterproof shade sails, from picking the right one to getting it up without a hitch. By the end, you'll be ready to transform your patio or courtyard into a shaded oasis. Let's dive in.

Understanding Waterproof Shade Sails
Waterproof shade sails are triangular or rectangular fabric structures stretched between anchor points to create shaded areas. What sets them apart from regular shade cloths is their ability to repel water, thanks to materials like heavy-duty PVC or laminated fabrics that prevent leaks during those sudden summer storms we all know too well in Australia. They're designed for durability, often lasting 8-10 years with basic upkeep and up to 30 years before a full swap.
Think about it: in a country where outdoor living is basically a lifestyle—think endless barbecues, beach picnics, and family gatherings under the gums—these sails blend right in. They're lightweight yet tough against wind gusts and intense UV exposure, which is crucial down under where skin cancer rates are high. Plus, they come in shapes that fit any space, from a simple triangle over a sandbox to a multi-sail setup shading your entire alfresco area. Related perks include cooler indoor temps by blocking sun on walls and adding a modern vibe to your home's exterior.
Why Waterproof Shade Sails Are a Game-Changer for Australian Homes
Australia's climate is a mixed bag: scorching summers, unexpected downpours, and that relentless UV index. Waterproof shade sails tackle it all head-on. They block up to 98% of harmful rays, keeping your family safe while letting you enjoy the outdoors longer. No more packing up the picnic because of a shower—the waterproof layer means you stay dry.
Culturally, Aussies thrive on outdoor time. From Sydney's harbor barbecues to Melbourne's suburban courtyards, these sails enhance that vibe. Imagine shading a poolside lounge where kids play without sunburn worries, or covering a deck for those rainy Easter long weekends. They're eco-friendly too, reducing air-con use and fitting into our growing love for sustainable home tweaks. And with trends leaning toward bold colors and overlapping designs, you can personalize them to match your place—vibrant reds for a coastal feel or neutrals for a sleek bush retreat.

Competitors like basic awnings might offer shade but often let water through, leading to drips and mold. Waterproof shade sails win for versatility and low upkeep, making them a top pick for home improvement projects across the country.
Local Considerations for Installing Waterproof Shade Sails in Australia
Before you start, get the lay of the land—literally. Australian regulations vary by state and council, so check your local rules early. In places like Melbourne or Brisbane, small sails under certain sizes might not need permits, but larger ones or those with new posts often do. You could require engineering certification for wind loads, especially in gusty areas like Perth or Adelaide. Fire-retardant materials are a must in bushfire-prone zones, per the National Construction Code.
Providers are plentiful—look for local installers with licenses like builders' tickets, height work certs, and public liability insurance to keep things safe and compliant. Examples abound: councils in Victoria use them for playgrounds, while Queensland homes shade backyards against tropical rains. Culturally, they're a nod to our practical ingenuity—simple, effective solutions for making the most of our wide-open spaces without breaking the bank.
Plan for your spot's sun path too; tools like free online calculators help position sails for max coverage during peak hours.
Tools and Materials You'll Need
Gathering your gear upfront saves headaches later. For a basic DIY install on a waterproof shade sail (around 3x3 meters), here's what to grab:
· Waterproof shade sail kit: Choose UV-stabilized PVC fabric with reinforced edges.
· Anchor points: Stainless steel brackets, eye bolts, or turnbuckles—four per sail for tension.
· Posts or fixings: Galvanized steel poles (if not using existing structures like fences or walls).
· Tools: Drill with masonry bits, ladder, measuring tape, level, wrench set, and cable ties for temporary holds.
· Safety extras: Gloves, helmet, and harness for heights.
· Sealants: Waterproof caulk for wall mounts.
Budget tip: A quality sail runs $200–$500, plus $100–$300 for hardware. Always opt for marine-grade fittings to handle salty coastal air.
Step-by-Step Installation Guide
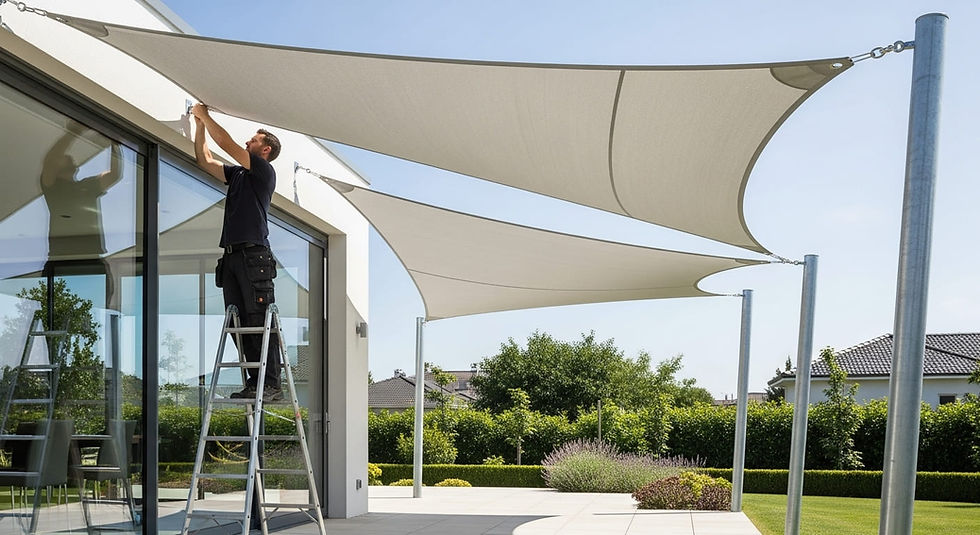
Ready to roll up your sleeves? Installing waterproof shade sails is straightforward if you take it slow. Aim for a team of two for safety. This guide assumes a triangular sail on existing points; adjust for your setup.
Step 1: Plan and Measure Your Space
Sketch your area first. Measure distances between anchors—aim for 1–2 meters height difference for drainage, with the lowest point at least 2.5 meters off the ground to clear heads. Use a sun chart app to ensure 70–80% coverage. Mark spots with chalk and double-check for overhead wires or branches.
Step 2: Prepare Anchor Points
Secure your fixes. For walls, drill pilot holes and bolt in brackets with expansion anchors. On posts, weld or clamp eyes. If adding poles, dig holes 60cm deep, pour concrete, and let it set 24 hours. Pro tip: In Aussie soils, add gravel for drainage to prevent rot.
Step 3: Attach the Sail
Start at the highest corner. Loop D-rings over bolts and hand-tighten. Work to the lowest point last, using turnbuckles to pull evenly. Tension should make the fabric drum-tight but not sag—about 50–100kg per corner, tested by plucking like a guitar string.
Step 4: Fine-Tune and Test
Level everything with a spirit tool. Walk underneath and shake for wobbles. Hose it down to check water runoff—slight pitch prevents pooling. Adjust as needed, then seal edges with caulk.
Step 5: Safety Check and Enjoy
Inspect for sharp edges and add warning signs if over play areas. In windy spots, release tension during storms. Voila—your waterproof shade sail is live!
If DIY feels daunting, local pros can handle it in a day, ensuring compliance.
Maintenance Tips to Keep Your Waterproof Shade Sails
Looking New
Like any outdoor feature, waterproof shade sails need TLC to thrive in our tough conditions. Clean twice yearly—hose off dirt, then mild soap for bird droppings or sap. Winter's ideal, when sails see less action. Avoid bleach to preserve the waterproof coating.
Check tension seasonally; retighten after heavy rains. Store extras rolled, not folded, to dodge creases. With care, they'll shield your space for years, cutting energy bills by keeping heat out.
Questions and Answers: Common Questions About Waterproof Shade Sails in Australia
Got queries? We've rounded up the top ones from Aussie homeowners, answered straight.
Q: Are waterproof shade sails suitable for Australia's harsh climate?
Ans: Absolutely—they're built for our UV blasts and sudden rains. Materials like PVC hold up against salt air and winds up to 100km/h, making them perfect for coastal or inland spots.
Q: Can I install a waterproof shade sail myself, or do I need a pro?
Ans: DIY works for small sails if you're handy, but for larger ones, call a licensed installer. Councils often require certs for safety, and pros ensure proper tension to avoid tears.
Q: How long do waterproof shade sails last in Australia?
Ans: With good maintenance, 10–15 years easy, up to 30 with repairs. UV stabilizers fight fading, but inspect edges yearly for wear from our intense sun.
Q: Do waterproof shade sails need council approval in Australia?
Ans: It depends on size and location—small backyard ones usually don't, but check your local rules. In fire zones, fire-retardant types are key.
Q: What's the best pitch for a waterproof shade sail to avoid water pooling?
Ans: Aim for 5–10 degrees slope toward the lowest point. This lets rain drain off without sagging the fabric, a must in rainy states like Queensland.
Conclusion: Your Path to a Successful Waterproof Shade Sails in Australia
Wrapping it up, waterproof shade sails are your ticket to worry-free outdoor bliss in Australia. We've covered the basics: their UV-blocking, rain-repelling magic; smart planning around local regs like council nods and fire standards; and a no-fuss install that boosts your home's vibe. Whether shading a Melbourne courtyard or a Brisbane barbie zone, they tie into our love for al fresco life while keeping things cool and dry.
Next steps? Measure your space today, snag quality materials from a trusted supplier, and either DIY or book a local expert. Before long, you'll be toasting under your new sail, safe from the sun and storms. Your backyard upgrade awaits—get shading!


Comments